Sunday night used to be my takeout night—I was too exhausted to cook after a busy weekend. By Monday I’d buy an overpriced salad because my fridge was empty, and by Wednesday half the produce I’d bought with good intentions was wilting in the crisper drawer.
Sound familiar? I learned that the right meal prep tools save time and money. Now I spend about 2 hours on Sunday prepping components and lunches for the week, and that routine cuts my lunchtime spending by around $50 a week.
These aren’t flashy gadgets that collect dust. They’re practical tools I use every single week to make meal prep faster, more efficient, and actually enjoyable. They’ve changed how I eat, saved me time and money, and helped me stick with meal prepping over the years.
What You’ll Need
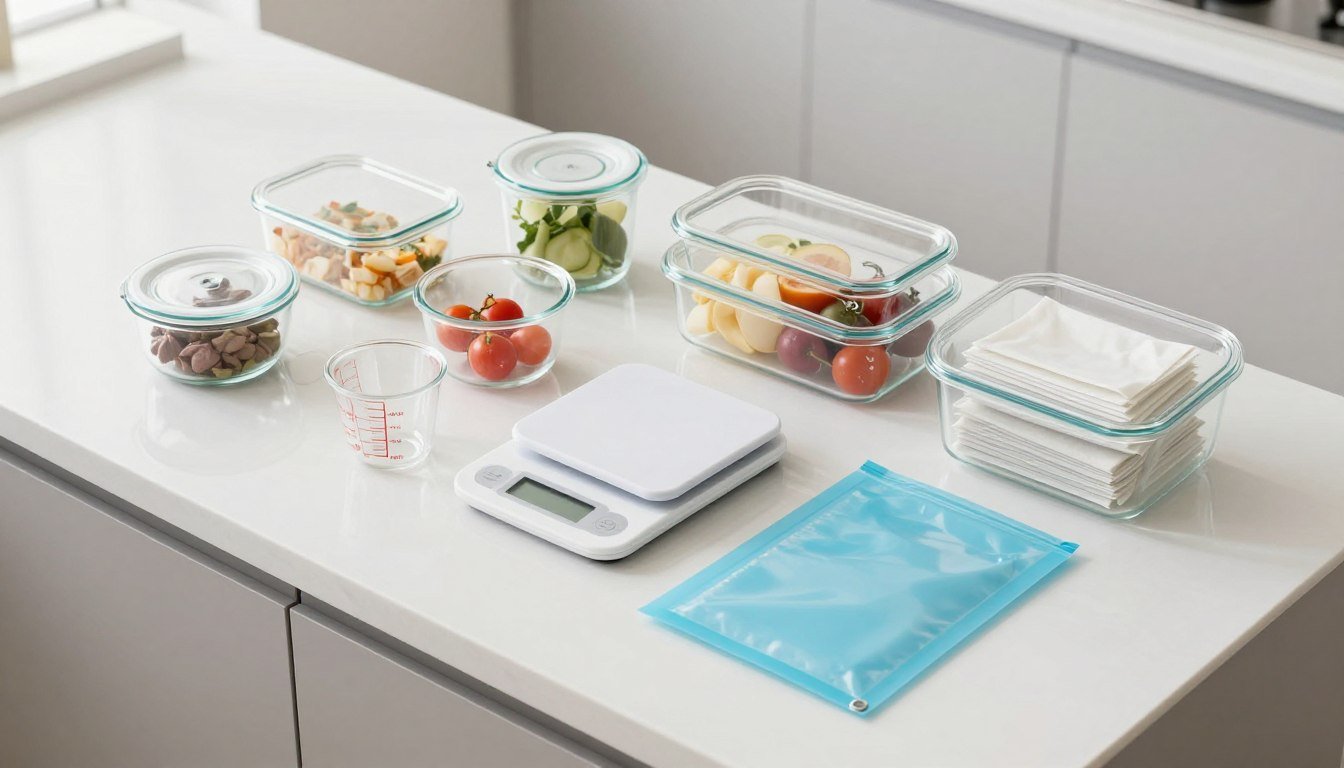
These core meal prep tools will help you save time, reduce food waste, and keep portions consistent so you can eat well all week without extra effort.
- Digital food scale (start with one reliable scale — weigh proteins and grains in ounces/grams)
- Measuring cups and spoons set (stainless steel set; 1 cup, 1/2, 1/3, 1/4 + standard spoons)
- Glass meal prep containers (3-compartment, 4–6 containers for a week)
- Stainless steel bento box (lightweight option for cold lunches)
- Salad container with dressing cup (separate dressing + toppings tray)
- Portable condiment containers (1–2 oz sizes for sauces and small add-ons)
- Leak-resistant food storage container set (varied sizes for prepped ingredients)
- Reusable silicone storage bags (freezer- and sous-vide-friendly options)
- Plastic wrap cutter / bag clips (for quick covers and sealing partial bags)
- Clear fridge organizer bins (use handles and labels to keep things visible)
Want the step-by-step schedule? Jump to My Simple Weekly Meal Prep Routine.
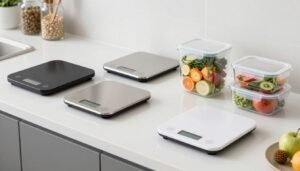
Digital Food Scale

My digital scale is the unsung hero of my meal prep routine. Before I had one I habitually over-portion proteins and grains and ran out of ingredients midweek. Using the scale I now portion consistent meals — for example, a 4-ounce (about 113 g) chicken portion — and I can quickly measure grains by weight for repeatable results.
I use the scale for portioning proteins, measuring rice and quinoa, and even dividing cookie dough so every batch bakes evenly. It speeds up prep (weigh once, then portion multiple servings in under five minutes) and reduces food waste, which saves time and money over the week.
What to look for:
- Measurement options in both grams and ounces (use grams for consistency)
- Tare function to subtract container weight
- Easy-to-clean flat surface and stable platform
- Battery type and power: choose a model with common batteries or rechargeable power
Quick tip: Keep your scale on the counter rather than in a drawer to encourage frequent use.
Shop my pick here: [AFFILIATE LINK #1 – Digital Food Scale]
Measuring Cups and Spoons Set

When you move from improvisational weeknight cooking to meal prepping, consistency matters. A sturdy stainless steel measuring cups and spoons set ensures your overnight oats, grains, and dressings turn out the same every time—so you actually enjoy eating the same meal multiple days in a row.
I recommend stainless steel over plastic because it’s non-porous (won’t absorb odors or stains) and stands up to dishwasher cycles. Look for a nesting set with the standard sizes—1 cup, 1/2, 1/3, 1/4—and the usual teaspoon/soupoon lineup so you’re covered for recipes and batching.
What to look for:
- Stainless steel construction (18/8 or 18/10 for durability and rust resistance)
- Clear, stamped measurement markings that won’t wear off
- Storage solution (nesting cups and a ring for spoons) to keep everything together
Quick tip: Measure dry ingredients first, then wet, to avoid extra rinsing while you prep.
Metric conversions cheat sheet: 1 cup ≈ 240 mL, 1/2 cup ≈ 120 mL, 1 tablespoon ≈ 15 mL—keep these handy for recipes that use grams or milliliters.
Use the 1/3 cup + 2/3 cup milk ratio for creamy overnight oats—an easy micro-example that makes the set feel essential.
Shop my pick here: [AFFILIATE LINK #2 – Measuring Cups & Spoons]
Glass Meal Prep Containers

Glass containers totally changed my meal prep routine. I stopped reheating food in plastic once I switched—glass lets me prep, store, reheat (when the manufacturer allows), and eat from the same container, which cuts down on dishes and keeps food tasting fresher. Divided 3-compartment containers are especially helpful so roasted veggies don’t make rice soggy.
I own two sets of 3-compartment glass containers (roughly 24–28 oz each), which is enough for a full week of lunches. They’re heavier than plastic, but the durability and food-safety trade-offs have been worth it for me over the years. Seeing colorful prepped meals through clear glass also makes me more likely to choose the healthy option at lunchtime.
What to look for:
- Leakproof, airtight lids (usually plastic lids with silicone seals)
- Tempered glass that’s microwave- and freezer-safe—check whether lids are oven-safe
- Compartments sized to prevent food mixing (protein + grain + veg)
Quick tip: Remove plastic lids before using glass containers in the oven, and always follow manufacturer temperature limits.
Sample packed lunch: 4 oz protein, 1 cup cooked grain, 1 cup roasted veggies—fits well in a 24–28 oz 3-compartment container.
Shop my pick here: [AFFILIATE LINK #3 – Glass Meal Prep Containers]
Stainless Steel Bento Box

When I need a lighter option for lunches that won’t be reheated, my stainless steel bento box is my go-to. It’s lighter than glass, avoids the staining and odor issues of plastic, and is rugged enough to survive being tossed in a bag on commute days.
The compartments make packing easy—think sandwich or protein in one section, salad or grain in another, and a small snack in the third. For dressings and wet items, use a tiny condiment container to prevent leaks. Over the years these have proven low-maintenance and reliable for daily meal prep.
What to look for:
- Food-grade stainless steel (18/8 or 18/10 recommended for corrosion resistance)
- Secure latches and a tight seal to minimize spills
- Multiple compartments sized for portion control and variety
Quick tip: These aren’t microwave-safe—reserve them for cold lunches, room-temperature meals, or packed snacks.
Shop my pick here: [AFFILIATE LINK #4 – Stainless Steel Bento Box]
Salad Container with Dressing Cup

Soggy salad is the enemy of meal prep, so a salad container with a sealed dressing cup was a game-changer for me. The separate dressing compartment and removable toppings tray keep wet ingredients away from delicate greens until you’re ready to eat, so your salad stays crisp all week.
I typically prep 3–4 salads on Sunday: greens in the main compartment, 3–4 oz protein (chicken, tuna, or chickpeas) in one section, and toppings like cheese, nuts, or roasted veggies in the tray. Keep dressing in the sealed cup until lunchtime, then shake everything together for a fresh salad that beats takeout.
What to look for:
- Truly leak-proof dressing container with a secure seal
- Separate compartment or removable tray for toppings
- Main compartment large enough for 3–4 cups of greens
Quick tip: Place a paper towel with your greens to absorb excess moisture; it keeps leaves crisp through the week.
Easy packing example: 3–4 oz protein + 1 cup cooked grain or 1 cup chopped veg + 2–3 cups greens, dressing in the sealed cup.
Shop my pick here: [AFFILIATE LINK #5 – Salad Container + Dressing Cup]
Portable Condiment Containers

Tiny portable condiment containers are one of my favorite small meal prep tools because they instantly change up flavors without extra work. The same base—chicken and rice, roasted veggies, or a grain bowl—can taste completely different across the week with a different sauce in each small cup.
I use 1–2 oz containers for dressings and sauces, and they’re also perfect for portioning calorie-dense add-ons like chopped nuts, grated cheese, or chocolate chips. The right seal prevents leaks, so I can toss them in my lunchbox without worry.
What to look for:
- Truly leakproof seals that survive travel
- Dishwasher-safe material for easy cleaning
- Multiple sizes (1 oz, 2 oz, and a slightly larger option) for versatility
Quick tip: Label lids with a washable marker when you prep several similar-looking sauces.
Pairing ideas: teriyaki or soy-based sauce for chicken; chimichurri for steak or roasted potatoes; tahini or lemon vinaigrette for grain bowls. For thick sauces, pack a tiny silicone brush or spoon to spread evenly.
Shop my pick here: [AFFILIATE LINK #6 – Condiment Containers]
Leak-Resistant Food Storage Container Set

In addition to meal containers, a good set of leak-resistant storage containers is the backbone of my prep system. After I chop vegetables, cook grains, or roast proteins, I store components separately so I can mix-and-match meals during the week—this gives more variety than pre-assembled lunches and makes weeknight assembly faster.
I favor containers with snap-lock lids and silicone seals that create a true airtight barrier. The right set keeps chopped peppers crisp, prevents cooked quinoa from drying out, and stacks neatly to maximize limited fridge space.
What to look for:
- Airtight seal with a secure locking mechanism (test lids for leaks before relying on them)
- Stackable, rectangular shapes to save fridge space
- A range of sizes—suggested starter set: 1 large (8-cup), 2 medium (4-cup), 4 small (1–2 cup) for portions and prep
Quick tip: Label containers with contents and the prep date (use a washable marker or labels) and store similar items together—proteins on one shelf, grains on another.
Shop my pick here: [AFFILIATE LINK #7 – Food Storage Container Set]
Reusable Silicone Storage Bags

I hesitated to buy reusable silicone bags at first, but they’ve paid for themselves many times over. I use them to freeze portioned proteins, store prepped fruits and veggies, and even for sous vide when the manufacturer lists compatibility. Compared with disposable plastic bags, silicone stands up to repeated washing and reduces single-use waste.
Their stand-up design makes filling easy, and a secure seal keeps food fresh. For freezer meal prep I portion raw chicken or marinated protein flat, freeze the bags, then store them upright like books so they thaw quickly and take up less space.
What to look for:
- Food-grade silicone (no fillers) and clear manufacturer specs for temperature limits
- Dishwasher-safe construction for easy cleaning
- A range of sizes (small for sauces/snacks, medium for single portions, large for bulk or sous vide)
Quick tip: Freeze bags flat first, then stand them upright in the freezer for efficient storage and faster thawing.
Cleaning & care: rinse with hot water after use, let bags air-dry open and standing to prevent odors, and check manufacturer guidance before using for sous vide (confirm max temperature).
Shop my pick here: [AFFILIATE LINK #8 – Reusable Silicone Bags]
Plastic Wrap Cutter / Bag Clips

This humble tool saves time and frustration—no more wrestling with tangled plastic wrap or hunting for the loose end. I use a wrap cutter to quickly cover bowls of prepped ingredients that don’t need a full container; the built-in cutter gives a clean edge every time and speeds up the finishing steps during batch prep.
I also keep a variety of bag clips on the prep counter for sealing partial bags of spinach, shredded cheese, or frozen vegetables. Good clips create a tighter seal than folding alone, which helps extend freshness and reduces waste—small items, big impact.
What to look for:
- Sharp, protected cutting edge (with safe blade replacement options)
- Non-slip base or mount so the cutter stays put while you work
- Sturdy, airtight clips that grip different bag thicknesses
Quick tip: Keep the wrap cutter and clips near your main prep station so you can cover bowls and reseal bags by hand as you finish each step.
Durability check: a good clip should close fully without flexing; test before you buy by clamping a folded bag and checking for gaps. If you prefer an eco option, try beeswax wraps plus clips for short-term covering.
Shop my pick here: [AFFILIATE LINK #9 – Plastic Wrap Cutter / Bag Clips]
Clear Fridge Organizer Bins

Clear fridge organizer bins are the final piece of my meal prep system—once I added them, my refrigerator went from cluttered chaos to a visible, usable pantry on wheels. I assign bins for prepped proteins, cut vegetables, ready lunches, and breakfast items so everything is easy to find and nothing gets lost at the back of the fridge.
The transparent design and handles make it simple to pull out an entire category at once, which saves time during busy mornings and increases the chances I’ll actually eat what I prepped. When healthy options are visible and accessible, they win over takeout every time.
What to look for:
- Stackable design to maximize vertical fridge space
- Comfortable handles for easy access and removal
- Dimensions that fit your refrigerator shelves and door compartments (measure first)
Quick tip: Use BPA-free bins and label each one with contents and date; in multi-person homes, color-code or add names to keep things organized.
Example layout: top shelf — breakfasts and snacks; middle shelf — prepared lunches and proteins; bottom shelf/drawer — produce. Clean bins with mild soap and warm water weekly to avoid smells and cross-contamination.
Shop my pick here: [AFFILIATE LINK #10 – Fridge Organizer Bins]
My Simple Weekly Meal Prep Routine

- Plan and shop (20–30 minutes): Choose 2–3 main recipes for the week and create a shopping list. Use your digital food scale and recipe portions to buy the right amounts so you don’t overbuy.
- Prep ingredients (30–45 minutes): Wash, dry, and chop vegetables, portion proteins, and measure grains into containers—having everything organized before you turn on the stove speeds up the process. Store prepped ingredients in your leak-resistant containers so they’re ready to cook or assemble.
- Batch cook basics (30–45 minutes): Cook staples like rice, quinoa, roasted veggies, and proteins in batches. Use the oven or air fryer for hands-off roasting while you finish grains on the stove to make the most of your time.
- Assemble meals (15–20 minutes): Portion meals into your glass meal prep containers or stainless steel bento boxes for the first few days. For flexibility, assemble a few complete meals and keep other components separate so you can mix and match servings later in the week.
- Store strategically (5–10 minutes): Label containers with contents and date, then place ready-to-eat lunches in clear fridge organizer bins. Store meals for later in the week in the freezer—silicone bags or freezer-safe glass work well.
Beginner plan (a printable starter): Pick one protein (chicken or chickpeas), one grain (rice or quinoa), and two roasted vegetables. Example recipes: lemon-herb chicken + rice + broccoli; roasted sweet potato + black beans + spinach bowl. This small rotation makes meal prepping approachable while you build the habit.
Approximate total time: Expect 1.5–2.5 hours the first few times; as you get faster you can hit the ~2-hour mark mentioned earlier. Time per step will vary with equipment and recipe complexity—using an air fryer or multi-burner setup shortens active cooking time.
Food safety & storage reminders: Store cooked proteins in the fridge for up to 3–4 days; freeze meals you won’t eat within that window. Cool cooked food to room temperature (no longer than 2 hours) before refrigerating to protect texture and safety. Always check manufacturer guidance for containers and freezer limits.
Small-kitchen tips to make this work: Clear counters before you start and wash as you go so you always have workspace. Stack used mixing bowls and keep a trash bag or compost bowl nearby to speed cleanup. If your kitchen is small, prep components in batches over two short sessions (e.g., chop on Friday night, cook on Sunday).
Try this this week: On Sunday, prep components only—cook one grain, roast one tray of veggies, and portion one protein. Use your measuring cups and scale to standardize portions; after one week, you’ll notice saved time and less food waste.
Frequently Asked Questions
What are the best meal prep tools for beginners?
Start small. The three essentials I recommend are: glass meal prep containers with dividers (for ready-to-eat lunches), a reliable set of leak-resistant storage containers for prepped ingredients, and clear fridge organizer bins so you can see and reach what you’ve made. These address the biggest meal prep pain points—storage, organization, and visibility—without overwhelming you with gadgets. If you’ve tried everything and still struggle, focus on one meal a day (lunch or dinner) to build the habit.
Are glass meal prep containers better than plastic?
Glass has practical advantages: it doesn’t absorb odors or stains, generally handles reheating better, and lasts longer than many plastics. The trade-offs are weight and breakability—glass is heavier and can shatter if dropped. If carrying weight or durability is a concern, stainless steel is a good alternative for non-microwave lunches. (Always follow manufacturer guidance about microwave or oven use and check trusted consumer resources for safety details.)
How do I keep salads from getting soggy?
Separation and moisture control are key. Use a container with a dressing cup and a removable toppings tray, dry greens thoroughly after washing, and tuck a paper towel into the greens to absorb excess moisture. Store juicy ingredients (tomatoes, cucumbers) separately and add them just before eating. If you’ve tried these and your greens still wilt, try prepping heartier greens (kale, romaine) or prepping dressings with less oil if storage time is long.
How long does meal prep usually take?
Plan for about 1.5–2.5 hours for a week’s worth of lunches and some dinner components when you’re starting out. As you get faster and use tools like an air fryer or multi-burner setup, you can hit closer to the 2-hour mark. Break the time down roughly as: plan/shop 20–30 minutes, prep 30–45 minutes, batch-cook 30–45 minutes, assemble 15–20 minutes, and store 5–10 minutes. Split the work into two sessions if that fits your schedule better.
How long can I keep prepped food in the fridge or freezer?
For food safety, cooked proteins typically keep 3–4 days in the fridge; grains and roasted veggies usually last 3–5 days. Freeze meals you won’t eat within that window—many freezer-safe containers or silicone bags hold well for 2–3 months. Always cool cooked food to room temperature (no more than 2 hours) before refrigerating and follow container manufacturer guidance for freezer and reheating limits.
How should I clean and store reusable items like silicone bags and containers?
Rinse silicone bags with hot water right after use, then wash in the dishwasher or by hand with warm soapy water and let air-dry fully standing open to prevent odors. For containers and lids, separate seals before washing to remove trapped food. Replace silicone gaskets periodically if they show wear. If you use a food processor or blender during prep, clean them promptly (don’t let food dry into blades) to preserve performance.
Start Small and Build Your Meal Prep System

You don’t need every gadget to get started—pick three essentials that solve your biggest meal prep pain points and build from there. My first investments were quality containers (for storage and reheating), a digital food scale (for consistent portions), and clear fridge organizer bins (so prepped food actually gets eaten). Those three tools covered storage, portions, and visibility and let me make meal prepping a reliable part of my routine.
Start here mini-checklist: 1) one reliable digital scale (budget $15–$40), 2) a 4–6 pack of 3-compartment glass meal prep containers or a mixed container set (budget $25–$60), and 3) a couple of clear fridge bins sized for your shelves (budget $15–$30). Check return policies and warranties so you can swap if something doesn’t fit your fridge or workflow.
Remember, the best meal prep system is the one you’ll actually use. These meal prep tools saved me time and money, simplified mornings, and made weekday meals less stressful. Try buying one tool this week—start with the scale or a small set of containers—and track how much time and money you save after a few weeks. Your future self will thank you.
Affiliate Disclosure: Some links in this post are affiliate links, which means I may earn a small commission if you purchase through them—at no extra cost to you. I only recommend tools I genuinely believe are helpful for meal prep.
Disclaimer: This post is for informational purposes only and does not provide medical, nutrition, or professional advice. Always choose products and meal plans that fit your personal needs and dietary restrictions.